Introduction
Welcome to our comprehensive guide on how to fix a toilet that won’t flush! We understand the frustration and inconvenience of dealing with a malfunctioning toilet, and we’re here to provide you with expert advice and step-by-step instructions to resolve the issue. Whether you’re a DIY enthusiast or a homeowner in need of immediate assistance, this guide will equip you with the knowledge and solutions necessary to get your toilet flushing smoothly again.
Understanding the Problem
Before diving into the troubleshooting steps, it’s essential to understand the potential causes behind a toilet that won’t flush. By identifying the root cause, you can implement the most appropriate solution for your specific situation. Here are the common culprits:
Clogged Toilet: The most prevalent reason for a non-flushing toilet is a clog. Blockages can occur due to excessive toilet paper usage, foreign objects, or the accumulation of debris over time.
Faulty Flapper: The flapper is a rubber valve that controls the water flow from the tank to the bowl. If it doesn’t lift properly when the flush handle is pressed, water won’t flow into the bowl, resulting in an ineffective flush.
Incomplete Chain Connection: The chain inside the toilet tank connects the flush handle to the flapper. If the chain is too loose or disconnected, it can prevent the flapper from functioning correctly.
Water Level Adjustments: Insufficient water in the tank can impede a proper flush. This issue may arise from a malfunctioning fill valve or an improperly adjusted float.
Now that we have a clear understanding of the potential causes, let’s move on to the solutions.
Solution 1: Clearing a Clogged Toilet
Step 1: Gather the Necessary Tools
To tackle a clogged toilet, you’ll need the following:
Plunger
Toilet auger (if the plunger doesn’t work)
Rubber gloves
Bucket or container (optional)
Step 2: Plunge the Toilet
Place the plunger over the drain hole at the bottom of the toilet bowl, ensuring a tight seal.
Push down gently, then pull up rapidly to create suction. Repeat this motion several times.
If the clog persists, try using a toilet auger. Insert the auger’s flexible cable into the drain hole, rotate it gently, and continue until you feel resistance. Then, push and pull the drill to break up the clog.
Step 3: Test the Flush
Once the clog is cleared, flush the toilet to verify that the water drains properly. If the issue is resolved, congratulations! If not, proceed to the next solution.
Solution 2: Fixing a Faulty Flapper
Step 1: Turn off the Water Supply
Locate the shut-off valve behind the toilet and turn it clockwise to stop the water flow.
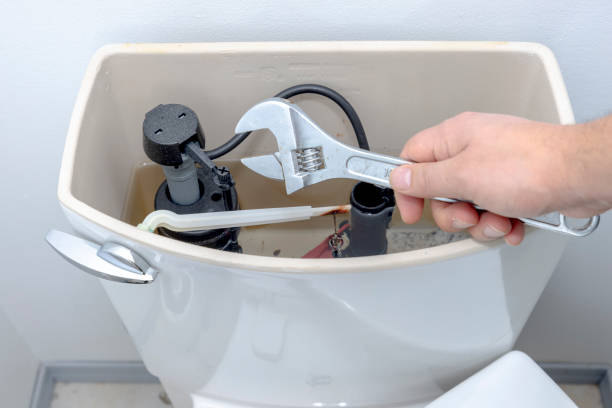
Step 2: Remove the Tank Lid
Carefully lift the tank lid and set it aside in a safe place.
Step 3: Inspect and Adjust the Flapper
Examine the flapper to ensure it’s not damaged or misaligned. If it appears worn or warped, replace it with a new flapper.
Adjust the chain connecting the flapper to the flush handle. It should have a slight slack, but the flapper should still seal the drain hole tightly when closed.
Step 4: Test the Flushing Mechanism
Turn on the water supply and let the tank refill. Flush the toilet multiple times to ensure the flapper lifts and seals correctly.
Solution 3: Resolving Chain Connection Issues
Step 1: Remove the Tank Lid
Similar to Solution 2, carefully lift the tank lid and set it aside.
Step 2: Inspect and Adjust the Chain
Check if the chain connecting the flush handle to the flapper is properly attached. Ensure that it has enough slack to allow the flapper to move smoothly during flushing.
Step 3: Test the Flush
Turn on the water supply, let the tank refill, and flush the toilet to confirm if the chain adjustment has resolved the flushing problem.
Solution 4: Adjusting Water Levels
Step 1: Remove the Tank Lid
Once again, carefully lift the tank lid and set it aside.
Step 2: Inspect the Water Level
Check if the tank’s water level reaches the designated mark or is approximately 1 inch below the overflow tube.
Step 3: Adjust the Float or Fill Valve
If the water level is too low, locate the fill valve and turn the adjustment screw or clip clockwise to increase the water level.
If the water level is too high, locate the fill valve and turn the adjustment screw or clip counterclockwise to decrease the water level.
Step 4: Test the Flush
Flush the toilet and observe whether the water level and flushing performance have improved. Repeat the adjustment if necessary.
Conclusion
By following the troubleshooting steps outlined in this guide, you can effectively fix a toilet that won’t flush. Remember to identify the underlying issue before proceeding with the corresponding solution. However, if you encounter persistent problems or are unsure about the required repairs, it’s always advisable to consult a professional plumber for expert assistance. However, if you are interested in replacing your toilet. Bathroom Hut is the largest bathroom supplier and has a huge range of toilets.
We hope this guide has provided you with the knowledge and guidance needed to resolve your toilet flushing issues. Good luck with your DIY repair endeavors, and may your toilet flush effortlessly once again! If you have problems with your floor under the bathroom, check out our expert guide on fixing water-damaged floors.